Showing posts with label tips. Show all posts

Thursday, December 29, 2016

How to Prevent "Sharpie" Permanent Markers from Blurring When Sealed


After I found my perfect paint pen for rocks (which did not blur when sealed), I received a blog post comment which suggested "applying a layer of Elmer's Glue on the Sharpie Art, allowing to dry, before applying spray sealant."

I decided to try this out for myself but instead of using a spray sealer, I used two of my preferred brush-on sealers.

My first test used a Sharpie ultra fine point black permanent marker. I printed the words "Sharpie test" on my stone and followed it with a thin coat of white glue. After the glue dried, I applied a thin coat of Delta Ceramcoat brush-on sealer.

White glue applied over a Sharpie marker before Delta Ceramcoat sealer
Result: Neither the glue nor my sealer blurred the words written on the stone with a Sharpie permanent marker pen.

For my second test, I used colored Sharpie permanent markers and drew a simple design on a pitted stone. Once again, a first coat of white glue was thinly brushed over the design. Then after the glue dried, I used Americana Duraclear brush-on sealer.

White glue applied over Sharpie markers before Duraclear Satin Varnish
Result: Neither the glue nor my sealer blurred the design drawn on the stone with various colors of Sharpie permanent marker pens.

I'm happy to report that white glue (e.g., Elmer's) used over Sharpie permanent marker pens did indeed prevent blurs when applied prior to both formulas of my clear sealers. (Note: I used this trick on small stones and cannot say how well it works with large painted rocks.)

Give this tip a try for yourself and let me know what you think.

White Glue over Sharpies Prevents Blurring by Cindy Thomas

© Cindy Thomas Painted Rocks

Monday, October 24, 2016

The Perfect Paint Pen for Rocks

I finally found a pen to use on rocks that doesn't blur with sealer!

For awhile I've been searching for the perfect paint pen (marker) to use on rocks. The problem has been the ink smears and blurs when a sealer is applied and the nib has been too thick for a nice, thin line.

It's been suggested I try a Posca pen so I purchased a brown Uni Posca Extra Fine Marker. I was looking specifically for a pen which could make a thin line in a brown color. (Most Posca pens I've seen come in sets of various colors and I didn't want to spend money on an entire set until I knew how they would perform on rocks and stones.)
Note: When you click on certain links in this post, I may receive a commission for the purchase of products.
As an Amazon Associate I earn from qualifying purchases.


I watched this helpful YouTube video to learn about my Posca pen before using it - "Getting Started with Posca Pens - Part 1":


This is what the tip of my Posca extra fine marker looks like:


To test the pen, I painted a small, slightly pitted stone with acrylic paint. I then used the brown Posca marker to draw some simple facial features on the rock.


So far so good. I was happy with the light brown color and the thin lines the marker created.

Next, I brushed on Mod Podge as a first coat of sealer and the Posca marker lines held up beautifully on the rock - no blurring/smearing.


(Note: I prefer to use Mod Podge as a first coat sealer because there seems to be less of a reaction with paints. The Mod Podge is then followed up with Americana DuraClear Satin Varnish. Click here to learn more about how I seal my painted rocks.)

I then experimented by using the pen to add lettering to a rock. Because I'm a left-handed writer, I push the pen rather than pull it across the rock. The result was little dots of ink where the nib "dragged" against the rock. However, I was able to paint over the ink dots and sealed the stone with no adverse effects.


Another experiment involved using the Posca pen on a polished stone. Usually paint and pens will not adhere to polished stones, however, the Posca marker performed beautifully and did not smear with the application of Americana DuraClear Satin Varnish.


I'm hoping the Posca marker is the answer to my search for the perfect paint pen (marker) for rocks. However, using the Posca pen on three stones is not enough to declare it a success. I question how long the pen will last, will it leak, will the texture of rocks and stones affect the nib.

As I continue to use the Posca pen, I will update this post with any additional positive or negative aspects about the marker.

11/12/18 Update: Yes, Posca pens are wonderful to use on rocks. In fact, Posca pens and mandalas are meant for each other.


Note: When you click on certain links in this post, I may receive a commission for the purchase of products. As an Amazon Associate I earn from qualifying purchases.

Please leave a comment with any tips, praises or problems you've had with Posca pens. I'd love to hear what you think about this product.

Helpful Links:
Posca Instructions for Use
Brown Extra Fine Point Posca Pen
Individual Posca Pens for Sale in Various Colors
Set of 12 Extra Fine Point Posca Pens in Various Colors
Use Paint Pens Instead of a Brush for Detailing

Note: When you click on certain links in this post, I may receive a commission for the purchase of products. As an Amazon Associate I earn from qualifying purchases.

© Cindy Thomas Painted Rocks

Thursday, October 16, 2014

Rock Painting Tips for Beginners


Where to Find Rocks

For many of us, rocks are plentiful in our environment and free for the taking. If you have difficulty finding stones to paint, you can:

Note: When you click on certain links in this post, I may receive a commission for the purchase of products.
As an Amazon Associate I earn from qualifying purchases.
Stones purchased from Home Depot

I do not condone removing rocks from government lands or parks or a residence or business which has been landscaped with rocks. 


How to Prepare Rocks and Stones for Painting

You will need to clean and (in some cases) prime your rocks prior to painting. Read more about this tip.

Learn how to prepare stones for painting
 
How to Make Stones Stand Upright

If your rock is wobbly and you would like it to stand upright, read this tip for adding a base.

Learn how to add a base to stones
 
What Are the Best Brushes for Rock Painting?

You can use any brush to paint rocks (and I have many) but I keep returning to the same three brushes. Learn about my favorite brushes.

Learn about my favorite brushes
 
What Type of Paint is Best for Rocks and Stones?

Acrylic paint and craft acrylic both work well on rocks. The difference between them is the craft acrylic is thinner and more paint applications may be necessary. Learn about specialty paints you can also use on rocks.

Learn about specialty paints for rocks
 
Can I Use Sharpies on Painted Rocks?

Regular Sharpie markers smear and change color when a sealer is applied. Learn about paint pens suitable for rocks.

Learn more about these paint pens


How to Correct Mistakes on Painted Rocks

Learn how to fix a mistake while painting a rock and after it's finished (but before it's been sealed).

Learn how to fix mistakes on painted rocks


How to Seal and Protect Painted Rocks

Painted rocks beg to be picked up and admired and by applying a sealant, the colors remain true and the life of the painted rock is extended.  


How to Display Painted Rocks - Store-Bought and DIY Solutions

You can display painted rocks by using wooden, metal and plastic display easels, a plate stand, or DIY stand made from drapery slip-on hooks. Learn how to make your own display stand and see other options here.  


Optional Household Items


Can't Draw? No Problem
Create colorful painted stones with this no-draw technique.

Learn how to paint these stones - no drawing required

You  can trace a pattern onto a rock and paint it.

Learn how to trace a pattern onto a rock
 
Where to Find Rock Painting Ideas
Note: When you click on certain links in this post, I may receive a commission for the purchase of products.
As an Amazon Associate I earn from qualifying purchases.


My Favorite Tools and Supplies

I use these tools and supplies regularly to paint rocks and recommend them. (I may receive a commission for the purchase of products when you click on certain links in this post.)


© Cindy Thomas Painted Rocks

Friday, October 10, 2014

Website for Everything Cindy Painted Rocks

It occurred to me I needed a "hub" to make it easier for you to quickly find my rock painting information.

So, I created...
 
www.CindyPaintedRocks.com

From this "hub" site you can easily get to my:
  • Rock painting blog where I share rock painting tips, ideas, and inspiration
  • Facebook page where you can see my current painted rock projects and interact with myself and others in "real time"
  • Pinterest boards where I collect rock painting ideas and share rocks painted by myself and others
  • Flikr gallery where I regularly add photos of the rocks I've painted
  • He is my Rock where you can learn about the unique nativity sets, scenes and figures I paint on rocks and stones
  • Online store where you can purchase my hand-painted rocks and stones
 

Go to CindyPaintedRocks.com and bookmark the site so you can quickly and easily:
  • Find new rock painting ideas and inspiration
  • Read more about me and how rock painting has changed my life and affects me daily
  • Contact me
© Cindy Thomas Painted Rocks

Thursday, March 13, 2014

Rock Painting Tip: How to Identify Colors from a Photo

 
This recent rock painting project called for cadmium yellow deep acrylic paint. I did not own that color and I had no clue what it looked like other than a shade of yellow.

An internet search for cadmium yellow deep returned several different shades.


Which of these deep cadmium yellows was I supposed to use?

Here's a helpful tip to identify colors and color match using the Microsoft Paint program and the color picker tool.


For my example, I'm using a photo of Cadi, my favorite Corgi.

Open the photo you're working from in MS Paint or other painting program and click the eyedropper (circled below).


When you click on a section of your photo with the eyedropper, the color of that section appears in the "Color 1" box (circled below). You can then use the brush tool or draw a box and fill it with that color. Do the same thing for other sections of your photo.

 
Now you have the hues you need to paint your rock project. You can print the photo and use it as a guide for purchasing your acrylic colors or use the photo as a guide for mixing your own colors.


Useful Resources

A special thanks to Lisa from ROCK ART USA for the idea and Shirley for permission to use Cadi's photo. 

© Cindy Thomas Painted Rocks

Tuesday, March 4, 2014

Rock Painting Ideas: Birds Painted on Rocks

Spring is just around the corner and bird song will soon fill the air. I'm collecting ideas on a new Pinterest inspiration board. It features tips and ideas for painting birds (other than owls) on rocks and stones.

Ideas: Birds Painted Rocks


I enjoy painting birds on rocks because of all the beautiful, bright colors I can use. If you are new to rock painting, there are many simple, whimsical ways you can paint a bird on a rock.


Visit my Pinterest Rock Painting Ideas and Helps board for more tips, tricks, ideas, and patterns to use for painting rocks, stones and pebbles.


© Cindy Thomas Painted Rocks

Monday, January 20, 2014

Rock Painting Ideas: People Painted on Rocks

I have a new Pinterest inspiration board. It features ideas and tips for painting people, figures, dolls and other types of folks on rocks

Ideas: People Painted Rocks


* * * * *


Fifty years ago, The Beatles invaded America and this idea pinned to my "people" board inspired these painted rocks.


Inspiration for The Beatles Painted on Rocks

A simple, sumo wrestler was inspired by this idea which is also "pinned" to the people painted rocks board.

Inspiration for Sumo Wrestler Painted Rock


* * * * *

Visit my Pinterest Rock Painting Ideas and Helps board to get inspiration for other painted rocks projects.


© Cindy Thomas Painted Rocks

Thursday, November 7, 2013

Rock Painting Ideas: Hearts Painted on Stones

You can paint all types of heart designs on triangular and heart-shaped rocks and they make great gifts for any occasion!


* * * * *
 
For ideas and inspiration to paint on heart-shaped and triangular rocks and stones, I've started a new Pinterest board - Ideas: Hearts Painted Rocks.


* * * * *

Here's a fun heart idea you can paint on a rock right now.


* * * * *

Visit my Pinterest Rock Painting Ideas and Helps board to get inspiration for other painted rocks projects.


© Cindy Thomas Painted Rocks

Monday, September 16, 2013

Rock Painting Ideas: Doodles, Patterns, Designs

I recently painted my first "Zen tangles" on stones and loved the process.

Learn how I painted these designs on stones


For repetitive-pattern drawing & painting inspiration, I have a new Pinterest board where I'll be collecting simple doodle, tangle and pattern ideas: Doodles, Tangles & Patterns.


Visit my Pinterest Rock Painting Ideas and Helps board to get inspiration for other painted rocks projects.


© Cindy Thomas Painted Rocks

Monday, August 19, 2013

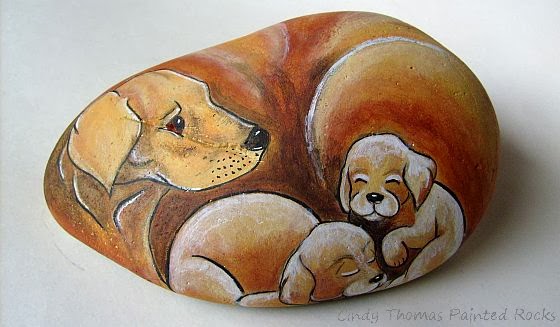
Rock Painting Ideas: Dogs and Puppies

I recently painted my first dog on a rock and enjoyed it more than I expected. (I'm a cat person.)


To help improve my canine drawing and painting skills, I now have a new Pinterest board for puppies and dogs: Ideas for Painted Dogs Rocks.


I painted this simple Corgi using a how-to drawing from my Pinterest Ideas for Painted Dogs Rocks board:


Visit my Pinterest Rock Painting Ideas and Helps board to get inspiration for other painted rocks projects.


© Cindy Thomas Painted Rocks

Saturday, June 29, 2013

Rock Painting Tip: Use Paint Pens Instead of a Brush for Detailing

Sometimes my rock is too small or my hand too unsteady to paint fine details with a brush. Regular Sharpie markers smeared and changed color when a sealer was applied. Micron pens scraped the paint off my rock and dried up quickly.

Update: Monday, October 24, 2016

Since the date of the original post, I have discovered the Uni Posca marker and consider it the best pen/marker for rock painting. This post has now been updated to include the Posca pen. (Click here to see my experiments with the Posca Pen.)


Four pens suitable for rock painting are the: 
Note: When you click on certain links in this post, I may receive a commission for the purchase of products.
As an Amazon Associate I earn from qualifying purchases.


While only one of these pens is my perfect solution, they all enable me to add details to my painted rocks without using a brush.

I drew a simple kitty using each pen to illustrate how they perform on a rock. (FYI: Smooth stones are easier to draw on than pitted stones.) 


Uni Posca Marker (water-based paint filled)


Uni Posca Marker - My Perfect Rock Painting Pen

 Pros
  • Available in various colors
  • Many tips available from extra fine point to extra broad
  • Can be used on unpolished and polished stones
  • Dries quickly
  • Does not blur or change color when sealer is applied
Cons
  • None


Elmer's Opaque Paint Marker (acrylic paint filled)


Elmer's Painters Pen
 Pros
  • Available in various colors
  • Fine tip available
  • Dries quickly
  • Doesn't smear or change color when sealer is applied
 Cons
  • Fine tip is not as fine as I'd like


Sharpie Oil-Based Paint Pen


Sharpie Oil-Based Paint Pen

Pros
  • Available in various colors
  • Fine & extra fine tips available
  • Dries quickly
  • Glossy
  • Doesn't smear or change color when sealer is applied
Cons
  • Fine tip is not as fine as I'd like (I have not tried the extra-fine tip)


Sagura Pigma Brush (archival ink)


Sakura Pigma Brush

Pros
  • Available in various colors
  • Dries quickly
  • You can control the thickness of the line by amount of pressure used when drawing
Cons
  • The kitty drawn with the Pigma Brush smeared when I applied a polyurethane varnish (Delta Ceramcoat)
Polyurethane sealer smeared my kitty design


Tip
  • After redrawing the kitty with the Sakura Pigma Brush, I carefully sealed the rock with a thin coat of Mod Podge first, then I applied the Delta Ceramcoat  
Apply Mod Podge first then polyurethane sealer when using Pigma Brush

I previously used three of these pens interchangeably but my new favorite is the Posca marker.


How to Prevent "Sharpie" Permanent Markers from Blurring When Sealed

Note: I may receive a commission for the purchase of products when you click on certain links. As an Amazon Associate I earn from qualifying purchases.

© Cindy Thomas Painted Rocks 

Tuesday, April 23, 2013

How To Mod Podge a Napkin onto Rocks


I was saving a pretty napkin for a craft project and decided to try Mod Podging it onto a large rock. (I love painting rocks and stones but wanted a break from detailed painting.)


First, I cut a design from the napkin that would fit best on the rock.


Then I used a brush to paint a thin coat of Mod Podge on the rock and pressed the napkin design carefully onto the rock.

Next I applied a coat of Mod Podge over the design.

PROBLEM: I could not smooth the wrinkles from the Mod Podge-saturated napkin without tearing it.

So, I left the wrinkles/bubbles.

Napkin design Mod Podged onto large rock

Maybe less is more? I decided to use smaller designs and smaller stones following the same steps as above.

This time I was able to smooth the Mod Podge-saturated napkin without tearing it.

Napkin design Mod Podged onto small stones

SOLUTION: When Mod Podging portions of a napkin onto a stone, smaller is better. 


Tips & Ideas:
  • Look for pretty napkins with small designs that would fit nicely on small stones
  • Work carefully once Mod Podge is applied to the napkin design to avoid tearing
  • My fingers worked best for smoothing the napkin after the Mod Podge was applied
  • Once the saturated napkin has dried, you can sponge paint around the edges (like the 2 green stones pictured above on the lower right)
  • For no-skill-required painting, Mod Podge the napkin design onto a stone and apply paint over it (using the design as a guide) so the rock will now look painted rather than Mod Podged
  • Add a few paint strokes in strategic spots or use 3-D fabric paint strategically for added dimension and interest
  • For a child's party, buy extra theme napkins and Mod Podge them onto stones as a party favor


© Cindy Thomas Painted Rocks