Showing posts with label free lessons. Show all posts

Sunday, December 3, 2017

How to Paint Baby Jesus on a Rock


Useful Links

Note: When you click on certain links in this post, I may receive a commission for the purchase of products. As an Amazon Associate I earn from qualifying purchases.

© Cindy Thomas Painted Rocks

Monday, June 26, 2017

Painting a Basket of Pansies on a Rock

Painted rock of a basket of pansies by Cindy Thomas


YOU can paint a pretty basket of pansies similar to this with the guidance of Ernestina Gallina's free tutorial.


This is my interpretation of Ernestina's tutorial and the steps are explained below.

Steps for a painted rock basket of pansies by Cindy Thomas


Step 1: Choose your rock.

A good shape for this project is round or oval. The rock I chose is oval and measures 3 inches x 5 inches.


Step 2: Paint the lower half of the rock with dark brown.

I chose a hue called "burnt umber" for the lower half of my stone. (I used both crafter's acrylic and acrylic paint for this project.)


Step 3: Paint evenly-spaced horizontal strips in a lighter brown.

I used a hue called "burnt sienna." Tip: Before I painted the strips, I sketched them with a white pencil so I'd have guidelines to follow.


Step 4: Paint evenly-spaced vertical strips in the light brown hue.

After sketching the vertical lines with my white pencil, I used the same "burnt sienna" hue to paint evenly-spaced, vertical strips. Tip: My vertical strips should have been painted closer together.


Step 5: Highlight A

I suggest you study Ernestina's tutorial before starting this step because it's a little tricky. I used a "terra cotta" hue and carefully placed alternating swatches of this color where my horizontal and vertical lines met. Tip: I practiced on paper before attempting to paint my rock.


Step 6: Highlight B

I used a "yellow ochre" hue and highlighted the horizontal and vertical terra cotta portions painted in Step 5.


Step 7: Highlight C

I mixed the yellow ochre hue with a little white acrylic paint and highlighted once again, trying to achieve an interlaced basket effect.


Step 8: Sketch the pansies.

I used my white pencil to sketch pansies on the upper portion of my rock. I placed them at different angles, made them different sizes, and placed some overlapping the basket.


Step 9: Paint pansy petals with white base coat.

When I base coated the pansies with white acrylic paint, I left the edges unpainted to set off the petals.


Step 10: Paint the empty space.

I first used a "leaf green" hue to paint my empty space but had to go back and repaint it later with "hunter green" which was a darker shade. Tip: Use a dark green hue for this step.


Step 11: Paint the flowers.

Instead of painting the pansies yellow as Ernestina explained in her tutorial, I referred to a photo with a different color combo. In general, pansies are painted lighter at the edges and darker in the center. Tip: I suggest you study Ernestina's tutorial to help you understand how to properly shade the pansy petals.


Step 12: Paint the leaves.

I used a "leaf green" hue to paint the leaves and mixed a little white with the green to outline and add veins to each leaf. (Note: I chose to omit the basket's handle on my basket of pansies.)

Painted Rock of Pansies in a Basket by Cindy Thomas

Pansies in a basket painted on a stone by Cindy Thomas


Step 13: Seal the stone with your preferred clear coat protection.

To seal my pansies in a basket painted rock, I brushed on a coat of Mod Podge, followed by a coat of Americana DuraClear Satin Varnish.


Helpful Links

  
© Cindy Thomas Painted Rocks

Monday, December 8, 2014

Christmas Holiday Painted Rocks Projects

Are you stumped and don't know what to gift a friend who has everything? How about a rock hand painted by you?

Are you looking for projects to keep the children busy during their break from school? How about an afternoon of painting rocks?

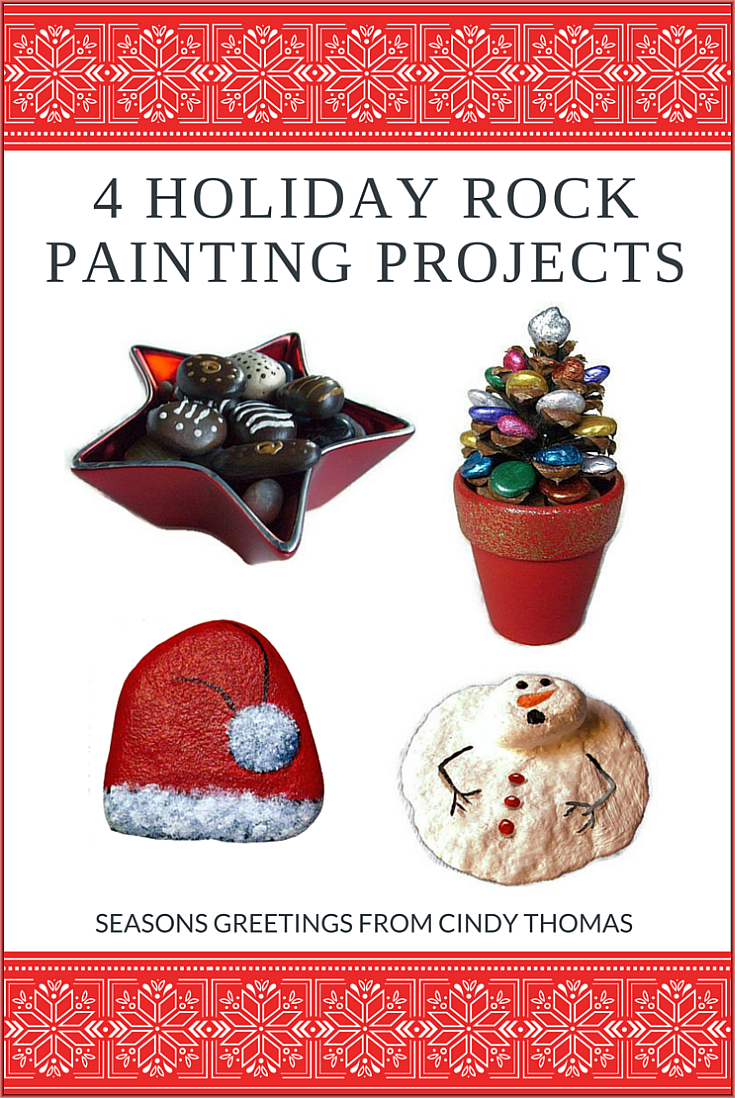
My gift to you is four holiday rock painting projects which are easy and fun for all ages to make, give and receive.


* * * * *
 

Sweet, Simple Gifts - No-Fat Rock Candy


Painted rock candies are a sweet gift to have on hand around the holidays and very easy to paint.

Learn How to Paint Rock Candy

 * * * * *

How to Paint a Santa Hat on Rocks and Stones


Painted Santa hat rocks make cute DIY Christmas gifts which are easy enough for children to paint and fun for all ages to give and receive.


Learn How to Paint a Rock Santa Hat

* * * * *

How to Make a Melting Snowman with Painted Rocks


"Build" this snowman in the warmth of your home instead of braving the cold, frosty outdoors.

Learn How to Paint a Melting Snowman on Rocks

* * * * *

How to Make Christmas Trees with Pine Cones and Painted Stones


Collect a few pine cones and use them with small, painted rocks to create a Christmas tree. 

Learn How to Paint a Pine Cone/Stone Christmas Tree

* * * * *

Merry Christmas, Everyone!

© Cindy Thomas Painted Rocks 

Friday, November 29, 2013

Free Rock Painting Tutorial: Christmas Mouse

Patsy Waters has graciously shared her tutorial for painting a very cute Christmas Mouse on a rock (or slate).

Photo Courtesy of Patsy Waters

Step-by-Step Instructions


Tutorial Courtesy of Patsy Waters


Another Variation


You can adapt the Christmas Mouse tutorial to create a prayerful Angel Mouse thanks to Lisa Carter of ROCK ART USA.  

Illustration Courtesy of Lisa Carter ROCK ART USA

* * * * *

Start painting now and you'll have some very cute gifts and stocking stuffers ready for the Christmas holiday.

Monday, July 8, 2013

Painting Rocks: How to Create a Stained Glass Effect with Glue and Paint

I tried this black glue painting technique on stones and rocks to create a stained-glass effect.

I had loads of fun with this easy project which is great for kids. They can easily draw their own design and paint within the lines.
 
Stained glass effect using "black glue"

Supplies
  • White school glue (e.g, Elmer's); 1/2 bottle
  • Black acrylic paint
  • Flat stone
  • Paint colors of your choice


Steps

  • Mix 2 squirts black paint into 1/2 bottle of white glue. (I used the end of an old paint brush to mix the glue and paint right in the bottle)
  • Draw your design on the stone with a pencil first
  • Trace over your pencil design by squeezing the black glue bottle (see Tips)
  • Let the black glue dry completely (several hours is best) before painting the sections
  • Paint each section. It will be easy to stay within the lines with the black glue border 
  • Finish with a gloss sealer
Tips
  • It's important to use this technique on a flat stone otherwise the glue will drip down the sides
  • After drawing your design with pencil, fill it in with white paint and your paint colors will be brighter
  • If you mess up while tracing your design with the black glue, just wipe it off before it dries
  • You can also correct and erase black glue mistakes by using a toothpick or paper clip to scrape off or re-shape the line when the glue is semi-dry
  • Two or more coats of paint may be necessary, especially if you didn't use white as a base coat  

Ideas

Look what you can paint on stones using the black glue technique


Black Glue Stone Heart Cheat Sheet


© Cindy Thomas Painted Rocks

Saturday, June 22, 2013

How to Paint a Stone-Clothespin Alligator Critter

Here's a fun, easy project for young and old alike using two common items - a clothespin and a stone.


Supplies Needed:
  • Wooden clothespin
  • Wedge-shaped stone
  • Acrylic paint - dark green, light green, pink, white, black, yellow
  • Glue

Instructions:
Look for a stone that has a shape resembling an alligator's head.


Paint the clothespin and stone dark green, leaving the teeth portion unpainted.


Paint the teeth portion of the clothespin white on both sides of the clothespin.


Paint the mouth area pink. (You'll need to hold the clothespin open while the paint dries, otherwise the top and bottom will stick together.)


Using a light green shade, paint 2 rows of arcs along the top of the clothespin. (You can mix a little white or yellow with the dark green color you used for the body to get a lighter green color.)


Mix a little black paint with the green color used for the body to get a very dark green shade. Use this color to fill in the area beneath each light green arc.


Outline each tooth on both sides of the clothespin with black paint. (You can also omit this step.)


Paint two nostrils and eyes using black paint.


Using a light green shade, paint eyelids over each eye and add a curved line on each side of the head from the nostril up to the eye.


Fill in the eye area with yellow or gold paint.


You can stop painting the head here, or add more detail by outlining each nostril and eye with white paint and adding a dot of white in the pupil.


Glue the painted stone head onto the tip of the clothespin. (I used E6000 glue to attach the head to the clothespin.)


You did it!


Ideas

  • Attach a magnet to the bottom of the clothespin to make a refrigerator magnet to hold artwork, lists, etc.


  • In the kitchen, use the stone-alligator clothespin as a fun, inexpensive way to close up bags to keep food fresher longer
  • Use the stone-alligator clothespin to keep stacks of papers together if you're out of binder clips. It's a great gift for teachers, office workers or anyone with a cluttered desk


  • Create other stone-clothespin critters with large teeth, e.g., sharks, dinosaurs, etc.

© Cindy Thomas Painted Rocks