
YOU can paint a pretty basket of pansies similar to this with the guidance of Ernestina Gallina's free tutorial.
This is my interpretation of Ernestina's tutorial and the steps are explained below.

Step 1: Choose your rock.
A good shape for this project is round or oval. The rock I chose is oval and measures 3 inches x 5 inches.
Step 2: Paint the lower half of the rock with dark brown.
I chose a hue called "burnt umber" for the lower half of my stone. (I used both crafter's acrylic and acrylic paint for this project.)
Step 3: Paint evenly-spaced horizontal strips in a lighter brown.
I used a hue called "burnt sienna." Tip: Before I painted the strips, I sketched them with a white pencil so I'd have guidelines to follow.

Step 4: Paint evenly-spaced vertical strips in the light brown hue.
After sketching the vertical lines with my white pencil, I used the same "burnt sienna" hue to paint evenly-spaced, vertical strips. Tip: My vertical strips should have been painted closer together.
Step 5: Highlight A
I suggest you study Ernestina's tutorial before starting this step because it's a little tricky. I used a "terra cotta" hue and carefully placed alternating swatches of this color where my horizontal and vertical lines met. Tip: I practiced on paper before attempting to paint my rock.
Step 6: Highlight B
I used a "yellow ochre" hue and highlighted the horizontal and vertical terra cotta portions painted in Step 5.
Step 7: Highlight C
I mixed the yellow ochre hue with a little white acrylic paint and highlighted once again, trying to achieve an interlaced basket effect.
Step 8: Sketch the pansies.
I used my white pencil to sketch pansies on the upper portion of my rock. I placed them at different angles, made them different sizes, and placed some overlapping the basket.
Step 9: Paint pansy petals with white base coat.
When I base coated the pansies with white acrylic paint, I left the edges unpainted to set off the petals.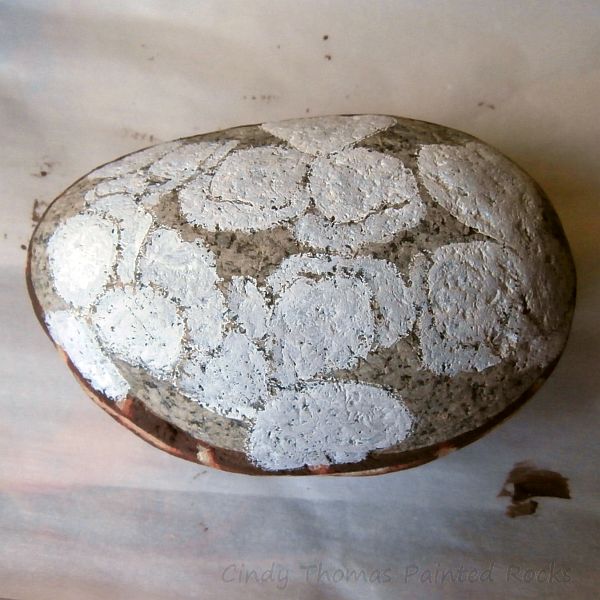
Step 10: Paint the empty space.
I first used a "leaf green" hue to paint my empty space but had to go back and repaint it later with "hunter green" which was a darker shade. Tip: Use a dark green hue for this step.
Step 11: Paint the flowers.
Instead of painting the pansies yellow as Ernestina explained in her tutorial, I referred to a photo with a different color combo. In general, pansies are painted lighter at the edges and darker in the center. Tip: I suggest you study Ernestina's tutorial to help you understand how to properly shade the pansy petals.


Step 12: Paint the leaves.
I used a "leaf green" hue to paint the leaves and mixed a little white with the green to outline and add veins to each leaf. (Note: I chose to omit the basket's handle on my basket of pansies.)

Step 13: Seal the stone with your preferred clear coat protection.
To seal my pansies in a basket painted rock, I brushed on a coat of Mod Podge, followed by a coat of Americana DuraClear Satin Varnish.

Helpful Links
© Cindy Thomas Painted Rocks


