Showing posts with label Ernestina Gallina. Show all posts

Friday, September 21, 2018

Before & After Painted Rocks: Dogs

Here are the rocks I used to paint various types dogs. Most often I chose a loaf-shaped rock for a reclining dog.

This is Max. He was a memorial stone and special request. Max was also used in my blog post about "How to Use a Wash and Tint Technique on Painted Rocks."


Say "hello" to Deuce. He was a special request for a birthday gift. (The brindle fur was quite a challenge for me.)


Meet Mr. Pug. He was painted using this tutorial by Ernestina Gallina.


This dog with puppies was painted using a tutorial from the e-book, "Artistry Set on Stone" by Suzi Chua.


Note: When you click on certain links in this post, I may receive a commission for the purchase of products. As an Amazon Associate I earn from qualifying purchases.

© Cindy Thomas Painted Rocks 

Friday, June 29, 2018

Before & After Painted Rocks: Cats

Here are the rocks I used to paint various types of cats along with the sketches for the placement of the kitty's features.

Sleepy Kitty - A Flora Tan Design


White Persian Cat - A Suzi Chua Design


Orange Striped Tabby - A Suzi Chua Design


Black and White Cat - An Ernestina Gallina Design


Brown Persian Kitty - A Suzi Chua Design


How to Paint Cats on Rocks Tutorials:
Note: When you click on certain links in this post, I may receive a commission for the purchase of products. As an Amazon Associate I earn from qualifying purchases.

© Cindy Thomas Painted Rocks

Monday, May 28, 2018

There's More Than One Way to Paint a Cat Rock

I used how-to guides from 4 different artists to create these kitty cats painted rocks.


Lin Wellford's book, "Painting Pets on Rocks" was the inspiration for this Black Cat painted rock.

Design courtesy of Lin Wellford

I found Lin's instructions clear and easy to follow. Other cat designs included in Lin Wellford's "Painting Pets on Rocks" book are: Tabby Cat, White Cat, Siamese Cat.

Note: When you click on certain links in this post, I may receive a commission for the purchase of products. As an Amazon Associate I earn from qualifying purchases.


This Black and White Cat was painted using Ernestina Gallina's downloadable PDF tutorial - "How to Paint on Rock a Black and White Cat."

Design Courtesy of Ernestina Gallina

This Black and White Cat was more difficult to paint than Lin Wellford's version, however, by following Ernestina's detailed instructions, I was pleased with the result.


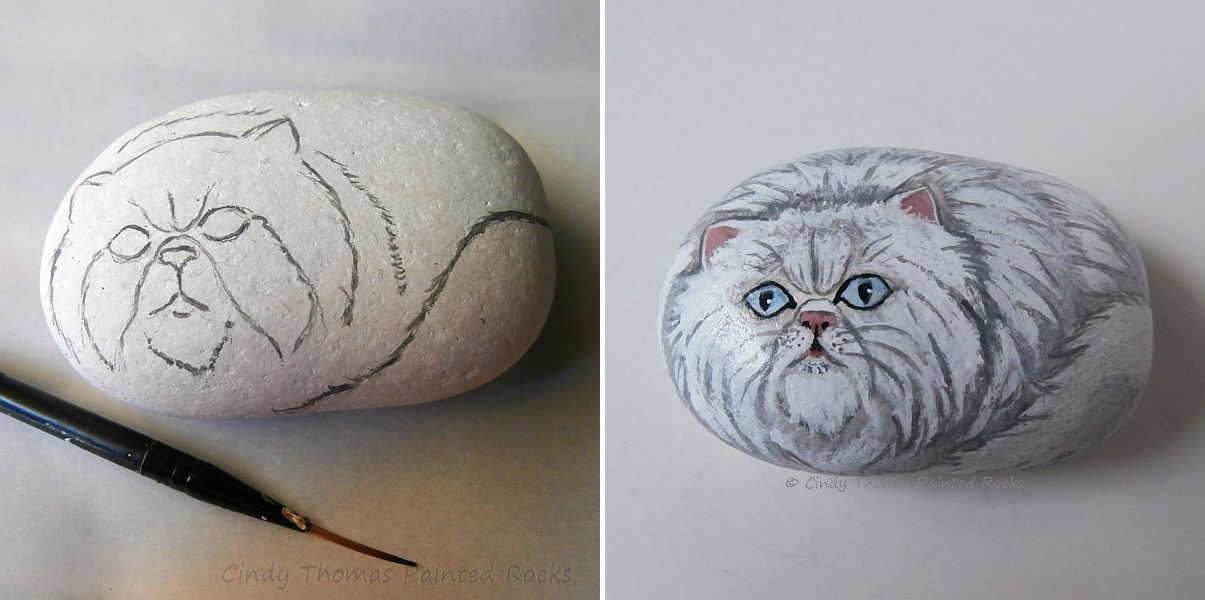
Suzi Chua's ebook "Let's Get Catty: Painting Realistic and Detailed Cats on Stone" inspired the Striped Orange Tabby and White Persian painted cats rocks.
 
Design Courtesy of Suzi Chua

I am always able to paint cute, whimsical designs using a Suzi Chua how-to guide. However, I find it necessary to study Suzi's included photos because her directions aren't as detailed as Lin Wellford's or Ernestina Gallina's and could be frustrating for beginners.


Flora Tan was a guest artist also featured in Suzi Chua's "Let's Get Catty" ebook who included instructions for painting this Sleepy Kitty.

Design Courtesy of Flora Tan
Of the five cats I painted using the how-to guides, I found the Sleepy Kitty to be the most challenging. The instructions were clear and detailed but all the fur strokes became frustrating for me.


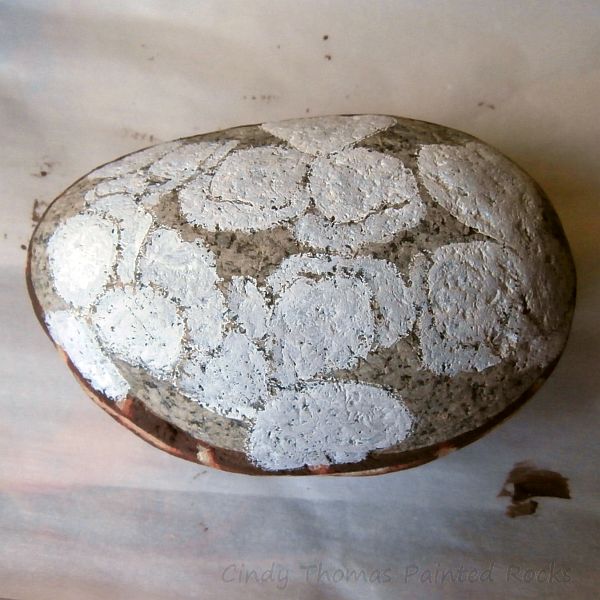
The steps for painting a cat on a rock are basically the same in each how-to guide. I often refer to and adapt various steps/features from each guide to paint my own version of a cat rock.


How to Paint Cats tutorials mentioned in this post:
Note: When you click on certain links in this post, I may receive a commission for the purchase of products. As an Amazon Associate I earn from qualifying purchases.

© Cindy Thomas Painted Rocks

Monday, June 26, 2017

Painting a Basket of Pansies on a Rock

Painted rock of a basket of pansies by Cindy Thomas


YOU can paint a pretty basket of pansies similar to this with the guidance of Ernestina Gallina's free tutorial.


This is my interpretation of Ernestina's tutorial and the steps are explained below.

Steps for a painted rock basket of pansies by Cindy Thomas


Step 1: Choose your rock.

A good shape for this project is round or oval. The rock I chose is oval and measures 3 inches x 5 inches.


Step 2: Paint the lower half of the rock with dark brown.

I chose a hue called "burnt umber" for the lower half of my stone. (I used both crafter's acrylic and acrylic paint for this project.)


Step 3: Paint evenly-spaced horizontal strips in a lighter brown.

I used a hue called "burnt sienna." Tip: Before I painted the strips, I sketched them with a white pencil so I'd have guidelines to follow.


Step 4: Paint evenly-spaced vertical strips in the light brown hue.

After sketching the vertical lines with my white pencil, I used the same "burnt sienna" hue to paint evenly-spaced, vertical strips. Tip: My vertical strips should have been painted closer together.


Step 5: Highlight A

I suggest you study Ernestina's tutorial before starting this step because it's a little tricky. I used a "terra cotta" hue and carefully placed alternating swatches of this color where my horizontal and vertical lines met. Tip: I practiced on paper before attempting to paint my rock.


Step 6: Highlight B

I used a "yellow ochre" hue and highlighted the horizontal and vertical terra cotta portions painted in Step 5.


Step 7: Highlight C

I mixed the yellow ochre hue with a little white acrylic paint and highlighted once again, trying to achieve an interlaced basket effect.


Step 8: Sketch the pansies.

I used my white pencil to sketch pansies on the upper portion of my rock. I placed them at different angles, made them different sizes, and placed some overlapping the basket.


Step 9: Paint pansy petals with white base coat.

When I base coated the pansies with white acrylic paint, I left the edges unpainted to set off the petals.


Step 10: Paint the empty space.

I first used a "leaf green" hue to paint my empty space but had to go back and repaint it later with "hunter green" which was a darker shade. Tip: Use a dark green hue for this step.


Step 11: Paint the flowers.

Instead of painting the pansies yellow as Ernestina explained in her tutorial, I referred to a photo with a different color combo. In general, pansies are painted lighter at the edges and darker in the center. Tip: I suggest you study Ernestina's tutorial to help you understand how to properly shade the pansy petals.


Step 12: Paint the leaves.

I used a "leaf green" hue to paint the leaves and mixed a little white with the green to outline and add veins to each leaf. (Note: I chose to omit the basket's handle on my basket of pansies.)

Painted Rock of Pansies in a Basket by Cindy Thomas

Pansies in a basket painted on a stone by Cindy Thomas


Step 13: Seal the stone with your preferred clear coat protection.

To seal my pansies in a basket painted rock, I brushed on a coat of Mod Podge, followed by a coat of Americana DuraClear Satin Varnish.


Helpful Links

  
© Cindy Thomas Painted Rocks