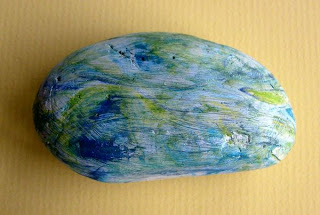
I came across this idea using shaving cream and acrylic paints and decided to experiment with stones instead of paper.
This video also shows the process.
 |
| My 1st try using shaving cream & acrylic paint on paper |
My 1st result using a stone (smeared by my finger)
 |
| My 2nd stone with a little peach color added (streaked by squeegee) |
I experimented a second time using different stones:
 |
| Primed, egg-shaped smooth stones and natural, flat porous stones |
 |
| Shaving cream and acrylic paint swirled and ready to go |
Here's the result of both attempts using the shaving cream/acrylic paint process on stones.
 |
| My results using primed and unprimed stones |
What I learned:
- Stones are heavy and sink into the shaving cream so the finished design is not as pretty and marbleized as when done using paper
- If your stones are very smooth, you'll need to paint 1-2 coats of white, acrylic paint to prime them first
- Painting the stones white helps the other colors show up better
- The stones are slippery when removing them from the shaving cream/acrylic and your fingers can "smear" some of the area when you remove them from the tray
- Removing the shaving cream with a squeegee left streaks on the rocks (I also used string and an index card and had the same results)
- This project is messy so you'll need to protect your work surface and have plenty of paper towels handy
- Once dry, you can protect the stones with a clear, polyurethane or acrylic sealer
Even though the results weren't as pretty as I hoped, this would still be a fun painting project for kids whether you use paper or stones.
Do you have any ideas for making this work better?
Please comment.
© Cindy Thomas Painted Rocks

No comments:
Post a Comment